Timeout Problems: Web Server + PHP

What?

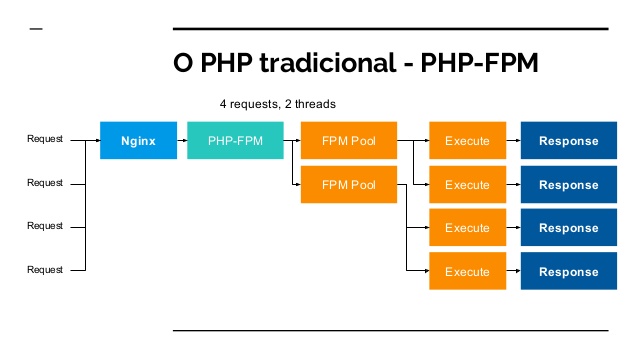
First there is an HTTP request and that will hit your Web server, then it will pass the request via TCP- or UNIT-Socket via FastCGI to your PHP-FPM Daemon, here we will start a new PHP process and in this process we will connect e.g. to the database and run some queries.

PHP-Request

The Problem!

There are different timeout problems here because we connect different pieces together and this parts need to communicate. But what if one of the pieces does not respond in a given time or, even more bad, if one process is running forever like a bad SQL-query.

Understand your Timeouts.

Timeouts are a way to limit the time that a request can run, and otherwise an attacker could simply run a denial-of-service with a simple request. But there are many configurations in several layers: Web server, PHP, application, database, curl, …

– Web server

Mostly you will use Apache or Nginx as Web server and in the end it makes not really a difference, there are different timeout settings, but the idea is almost the same: The Web server will stop the execution and kills the PHP process, now you got a 504 HTTP error (Gateway Timeout) and you will lose your stack trace and error-tracking because we killed our application in the middle of nothing. So, we should keep the Web server running as long as needed.

“`grep -Ri timeout /etc/apache2/“`

/etc/apache2/conf-enabled/timeout.conf:Timeout 60

/etc/apache2/mods-available/reqtimeout.conf:<IfModule reqtimeout_module>

/etc/apache2/mods-available/reqtimeout.conf: # mod_reqtimeout limits the time waiting on the client to prevent an

/etc/apache2/mods-available/reqtimeout.conf: # configuration, but it may be necessary to tune the timeout values to

/etc/apache2/mods-available/reqtimeout.conf: # mod_reqtimeout per virtual host.

/etc/apache2/mods-available/reqtimeout.conf: # Note: Lower timeouts may make sense on non-ssl virtual hosts but can

/etc/apache2/mods-available/reqtimeout.conf: # cause problem with ssl enabled virtual hosts: This timeout includes

/etc/apache2/mods-available/reqtimeout.conf: RequestReadTimeout header=20-40,minrate=500

/etc/apache2/mods-available/reqtimeout.conf: RequestReadTimeout body=10,minrate=500

/etc/apache2/mods-available/reqtimeout.load:LoadModule reqtimeout_module /usr/lib/apache2/modules/mod_reqtimeout.so

/etc/apache2/mods-available/ssl.conf: # to use and second the expiring timeout (in seconds).

/etc/apache2/mods-available/ssl.conf: SSLSessionCacheTimeout 300

/etc/apache2/conf-available/timeout.conf:Timeout 60

/etc/apache2/apache2.conf:# Timeout: The number of seconds before receives and sends time out.

/etc/apache2/apache2.conf:Timeout 60

/etc/apache2/apache2.conf:# KeepAliveTimeout: Number of seconds to wait for the next request from the

/etc/apache2/apache2.conf:KeepAliveTimeout 5

/etc/apache2/mods-enabled/reqtimeout.conf:<IfModule reqtimeout_module>

/etc/apache2/mods-enabled/reqtimeout.conf: # mod_reqtimeout limits the time waiting on the client to prevent an

/etc/apache2/mods-enabled/reqtimeout.conf: # configuration, but it may be necessary to tune the timeout values to

/etc/apache2/mods-enabled/reqtimeout.conf: # mod_reqtimeout per virtual host.

/etc/apache2/mods-enabled/reqtimeout.conf: # Note: Lower timeouts may make sense on non-ssl virtual hosts but can

/etc/apache2/mods-enabled/reqtimeout.conf: # cause problem with ssl enabled virtual hosts: This timeout includes

/etc/apache2/mods-enabled/reqtimeout.conf: RequestReadTimeout header=20-40,minrate=500

/etc/apache2/mods-enabled/reqtimeout.conf: RequestReadTimeout body=10,minrate=500

/etc/apache2/mods-enabled/reqtimeout.load:LoadModule reqtimeout_module /usr/lib/apache2/modules/mod_reqtimeout.so

/etc/apache2/mods-enabled/ssl.conf: # to use and second the expiring timeout (in seconds).

/etc/apache2/mods-enabled/ssl.conf: SSLSessionCacheTimeout 300

Here you can see all configurations for Apache2 timeouts, but we only need to change etc/apache2/conf-enabled/timeout.conf`` because it will overwrite `/etc/apache2/apache2.conf` anyway.

PS: Remember to reload / restart your Web server after you change the configurations.

If we want to show the user at least a custom error page, we could add something like:

ErrorDocument503 /error.php?errorcode=503
ErrorDocument 504 /error.php?errorcode=504

… into our Apache configuration or in a .htaccess file, so that we can still use PHP to show an error page, also if the requested PHP call was killed. The problem here is that we will lose the error message / stack trace / request etc. from the error, and we can’t send e.g. an error into our error logging system. (take a look at sentry, it’s really helpful)

– PHP-FPM

Our PHP-FPM (FastCGI Process Manager) pool can be configured with a timeout (request-terminate-timeout), but just like the Web server setting, this will kill the PHP worker in the middle of the process, and we can’t handle the error in PHP itself. There is also a setting (process_control_timeout) that tells the child processes to wait for this much time before executing the signal received from the parent process, but I am uncertain if this is somehow helpfully here? So, our error handling in PHP can’t catch / log / show the error, and we will get a 503 HTTP error (Service Unavailable) in case of a timeout.

Shutdown functions will not be executed if the process is killed with a SIGTERM or SIGKILL signal. :-/

Source: register_shutdown_function

PS: Remember to reload / restart your PHP-FPM Daemon after you change the configurations.

– PHP

The first idea from most of us would be maybe to limit the PHP execution time itself, and we are done, but that sounds easier than it is because `max_execution_time` ignores time spent on I/O (system commands e.g. `sleep()`, database queries (SELECT SLEEP(100)). But these are the bottlenecks of nearly all PHP applications, PHP itself is fast but the external called stuff isn’t.

Theset_time_limit()function and the configuration directive max_execution_time only affect the execution time of the script itself. Any time spent on activity that happens outside the execution of the script such as system calls using system(), stream operations, database queries, etc. is not included when determining the maximum time that the script has been running. This is not true on Windows where the measured time is real.

Source: set_time_limit

– Database (MySQLi)

Many PHP applications spend most of their time waiting for some bad SQL queries, where the developer missed adding the correct indexes and because we learned that the PHP max execution time did not work for database queries, we need one more timeout setting here.

There is the MYSQLI_OPT_CONNECT_TIMEOUT and MYSQLI_OPT_READ_TIMEOUT (Command execution result timeout in seconds. Available as of PHP 7.2.0. – mysqli.options) setting, and we can use that to limit the time for our queries.

In the end you will see a “Errno: 2006 | Error: MySQL server has gone away” error in your PHP application, but this error can be caught / reported, and the SQL query can be fixed, otherwise the Apache or PHP-FPM would kill the process, and we do not see the error because our error handler can’t handle it anyway.

Summary:

It’s complicated. PHP is not designed for long execution and that is good as it is, but if you need to increase the timeout it will be more complicated than I first thought. You need for example different “timeout”-code for testing different settings:

// DEBUG: long-running sql-call
// Query(‘SELECT SLEEP(600);’);

// DEBUG: long-running system-call
// sleep(600);

// DEBUG: long-running php-call
// while (1) { } // infinite loop

Solution:

We can combine different timeout, but the timeout from the called commands e.g. database, curl, etc. will be combined with the timeout from PHP (max_execution_time) itself. The timeout from the Web server (e.g. Apache2: Timeout) and from PHP-FPM (request_terminate_timeout) need to be longer than the combined timeout from the application so that we still can use our PHP error handler.

e.g.: ~ 5 min. timeout

  1. MySQL read timeout: 240s ⇾ 4 min.
    link->options(MYSQLI_OPT_READ_TIMEOUT, 240);
  2. PHP timeout: 300s ⇾ 5 min.
    max_execution_time = 300
  3. Apache timeout: 360s ⇾ 6 min.
    Timeout 360
  4. PHP-FPM: 420s ⇾ 7 min.
    request_terminate_timeout = 420


Links:

Kurztipp: mysqldump + Views

Problem: “DEFINER”

Jeder MySQL-Dump welcher mit dem Befehl “mysqldump” erstellt wird beinhalte die Einstellung zum “DEFINER”.

z.B.: DEFINER=`root`@`localhost` SQL SECURITY DEFINER

Dies bedeutet, dass man diesen SQL-Dump nicht einfach z.B. auf dem Ziel-Server nutzen kann, da die Applikation wahrscheinlich / hoffentlich keinen Root-Zugriff auf die Datenbank hat.

Lösung: via “grep”

Als schnelle Lösung für diese Problem entferne ich einfach den entsprechenden DEFINER-Eintrag.

mysqldump -u your_user --skip-comments --skip-opt --complete-insert --databases your_db | grep -v 'SQL SECURITY DEFINER' > ~/your_dump.sql

http://gist.suckup.de/tpl_default.php?pid=1#sec_fb936cf7878c32a5f0b0

Tipp im Tipp

Falls man mit Windows arbeiten muss, empfehle ich die Git-Bash (MinGW + GIT) zu installieren und das “mysql/bin” Verzeichnis im Windows PATH (System -> Erweiterte Systemeinstellungen -> Umgebungsvariablen) einzutragen. So kann man den oben genannten Befehl (und vieles mehr) auch unter Windows nutzen!


Links & Quellen:

– http://dev.mysql.com/doc/refman/5.1/de/create-view.html
– http://www.sitepoint.com/mysql-views/
– http://www.mingw.org/
– http://msysgit.github.io/

Rewrite-Rules: Apache vs Nginx

Bei dem Apache Webserver wird das URL-Handling (Rewrite-Rules) via .htaccess gesteuert, sobald sich eine Datei mit diesem Namen in einem Verzeichnis befindet, werden die darin enthaltenen Befehle vom Apache umgesetzt. Da dieses Verfahren jedoch voraussetzt, dass alle Verzeichnisse zuvor auf eine solche Datei geprüft, diese anschließend eingelesen und verarbeitet werden muss, macht es Sinn wie z.B. beim Nginx Webserver diese in die Konfiguration des Webs aufzunehmen. Leider ist die Syntax und Logik dieser beiden Rewrite-Rules nicht kompatibel, daher folgt eine Einführung in dieses Thema … außerdem habe ich auf github.com/voku/ meine kompletten Konfigurationsdaten für Nginx + PHP + MySQL hochgeladen.


Erklärung: einfache Weiterleitung


Apa­che:

Redirect /altes_Verzeichnis/alte_Seite.html http://suckup.de/


Nginx: 

rewrite /altes_Verzeichnis/alte_Seite.html http://suckup.de/ last;


Falls “/altes_Verzeichnis/alte_Seite.html” hinter deiner Domain in der URL steht, wird die Anfrage auf die Domain “meine_domain.de” umgeleitet.

z.B. http://suckup.de/altes_Verzeichnis/alte_Seite.html


Erklärung: Domain Weiterleitung


Apa­che:

RewriteCond %{HTTP_HOST} ^voku-online.de$ [NC]
RewriteRule ^(.*)$ http://www.suckup.de/$1 [R=301,L]


%{HTTP_HOST} -> Hostname


Nginx: 

if ($host ~* voku-online.de) {
rewrite ^(.*)$ http://suckup.de$1 permanent;
}


Fall der Hostname “voku-online.de” ist, dann wird dieser zu “suckup.de” umgeschrieben und alles was hinter der ursprünglichen Hostnamen stand, wird hinter den neuen gesetzt. 

^ -> Anfang 

.* -> “.” ein beliebiges Zeichen, “*” Wiederholung => alle beliebigen Zeichen

( ) -> erstes Vorkommen der einfachen Klammern wird zur ersten Variable $1 … u.s.w.

$ -> Ende

z.B. http://voku-online.de/altes_Verzeichnis/alte_Seite.html


Erklärung: entferne doppelte “/”


Apa­che:

RewriteCond %{REQUEST_URI} ^(.*)//(.*)$
RewriteRule . %1/%2 [R=301,L]


 %{REQUEST_URI} -> URL ohne Parameter

 ( ) -> erstes Vorkommen der einfachen Klammern in der “RewriteCond”-Bedingung wird zur ersten Variable %1 … u.s.w.


Nginx: 
if ($request_uri ~* “\/\/”) {
rewrite ^(.*)$ $scheme://$host$1 permanent;
}


\/ -> Escapezeichen “\” vor “/”

$scheme -> http bzw. https

$host -> Hostname

permanent -> gibt den Statuscode 301 zurück


Erklärung: statische Dateien (.css/.js/.html) beschleunigen


Nginx:

## static files are served directly
location ~* \.(?:js|css|htm?|js\?ver.*|css\?ver.*)$ {
        set $betterForCache  0;

        if ($args ~* ver=(.*)$) {
                set $betterForCache  1;
        }
        if ($request_uri ~* “/wp-admin”) {
                set $betterForCache  0;
        }
        if ($betterForCache = 1) {
                rewrite ^(.*) $scheme://$host$uri? last;
        }

        gzip_static on;

        autoindex off;
        expires 1d;
        add_header Pragma public;
        # We bypass all delays in the post-check and pre-check parameters of Cache-Control. Both set to 0.
        add_header Pragma public;
        add_header Cache-Control “public, must-revalidate, proxy-revalidate, post-check=0, pre-check=0”;
        ## No need to bleed constant updates. Send the all shebang in one
        ## fell swoop.
        tcp_nodelay off;
        ## Set the OS file cache.
        open_file_cache max=3000 inactive=120s;
        open_file_cache_valid 45s;
        open_file_cache_min_uses 2;
        open_file_cache_errors off;
        break;
}

Verschachtelte if-Abfragen kann man einfach via Hilfsvariablen (z.B. $betterForCache) erstellen …

$uri -> URL ohne Parameter

z.B.: http://suckup.de/wp-content/themes/mystique/css/core.css?ver=3.3.2


weitere Infos:

– Nginx & HttpRewriteModule:  http://wiki.nginx.org/HttpRewriteModule

– Apache & mod_rewrite: http://httpd.apache.org/docs/current/mod/mod_rewrite.html

– Beispiel-Konfiguration (WordPress Multi: Nginx + PHP-FPM): https://github.com/voku/CONFIG–nginx—php-fpm—mysql

MySQL: Zahl in Datum umwandeln

Falls jemand mal z.B. einen Int-Wert in ein Datum umwandeln muss, kann “CONVERT” bzw. “CAST” weiterhelfen. Auch wenn man eigentlich die Datenbank im Vorhinein so gestalten sollte, dass “date” / “datetime” / … / als Datentyp verwendet wird. ;)


Beispiel-Datenbank:

CREATE TABLE `lall` (
`Id` int(11) NOT NULL AUTO_INCREMENT,
`IntDate` int(11) NOT NULL DEFAULT '0',
PRIMARY KEY (`Id`)
) ENGINE=MyISAM DEFAULT CHARSET=utf8;

INSERT INTO `lall` VALUES (1,201001);
INSERT INTO `lall` VALUES (2,201002);
INSERT INTO `lall` VALUES (3,201003);
INSERT INTO `lall` VALUES (4,0);
INSERT INTO `lall` VALUES (5,201011);
INSERT INTO `lall` VALUES (6,201012);
INSERT INTO `lall` VALUES (7,201205);

SQL:

SELECT * FROM lall
WHERE ((CONVERT(CONCAT(IntDate, '01'), datetime))>NOW() - INTERVAL 12 MONTH OR IntDate=0)

< – dieses SELECT-Statement zeigt alle Datensätze an, welche nicht älter als 12 Monate sind oder als (int) Datum “0” eingetragen haben.

CONVERT -> http://dev.mysql.com/doc/refman/5.1/de/charset-convert.html
CONCAT -> http://dev.mysql.com/doc/refman/5.1/de/string-functions.html#id571625
NOW -> http://dev.mysql.com/doc/refman/5.1/de/date-and-time-functions.html#id586485

perror – Explain Error Codes für MySQL in der Shell

for i in `seq 1 180`; do perror ${i}; done | less

Info: http://dev.mysql.com/doc/refman/5.0/en/perror.html


Ausgabe:

OS error code   1:  Operation not permitted
OS error code   2:  No such file or directory
OS error code   3:  No such process
OS error code   4:  Interrupted system call
OS error code   5:  Input/output error
OS error code   6:  No such device or address
OS error code   7:  Argument list too long
OS error code   8:  Exec format error
OS error code   9:  Bad file descriptor
OS error code  10:  No child processes
OS error code  11:  Resource temporarily unavailable
OS error code  12:  Cannot allocate memory
OS error code  13:  Permission denied
OS error code  14:  Bad address
OS error code  15:  Block device required
OS error code  16:  Device or resource busy
OS error code  17:  File exists
OS error code  18:  Invalid cross-device link
OS error code  19:  No such device
OS error code  20:  Not a directory
OS error code  21:  Is a directory
OS error code  22:  Invalid argument
OS error code  23:  Too many open files in system
OS error code  24:  Too many open files
OS error code  25:  Inappropriate ioctl for device
OS error code  26:  Text file busy
OS error code  27:  File too large
OS error code  28:  No space left on device
OS error code  29:  Illegal seek
OS error code  30:  Read-only file system
OS error code  31:  Too many links
OS error code  32:  Broken pipe
OS error code  33:  Numerical argument out of domain
OS error code  34:  Numerical result out of range
OS error code  35:  Resource deadlock avoided
OS error code  36:  File name too long
OS error code  37:  No locks available
OS error code  38:  Function not implemented
OS error code  39:  Directory not empty
OS error code  40:  Too many levels of symbolic links
OS error code  42:  No message of desired type
OS error code  43:  Identifier removed
OS error code  44:  Channel number out of range
OS error code  45:  Level 2 not synchronized
OS error code  46:  Level 3 halted
OS error code  47:  Level 3 reset
OS error code  48:  Link number out of range
OS error code  49:  Protocol driver not attached
OS error code  50:  No CSI structure available
OS error code  51:  Level 2 halted
OS error code  52:  Invalid exchange
OS error code  53:  Invalid request descriptor
OS error code  54:  Exchange full
OS error code  55:  No anode
OS error code  56:  Invalid request code
OS error code  57:  Invalid slot
OS error code  59:  Bad font file format
OS error code  60:  Device not a stream
OS error code  61:  No data available
OS error code  62:  Timer expired
OS error code  63:  Out of streams resources
OS error code  64:  Machine is not on the network
OS error code  65:  Package not installed
OS error code  66:  Object is remote
OS error code  67:  Link has been severed
OS error code  68:  Advertise error
OS error code  69:  Srmount error
OS error code  70:  Communication error on send
OS error code  71:  Protocol error
OS error code  72:  Multihop attempted
OS error code  73:  RFS specific error
OS error code  74:  Bad message
OS error code  75:  Value too large for defined data type
OS error code  76:  Name not unique on network
OS error code  77:  File descriptor in bad state
OS error code  78:  Remote address changed
OS error code  79:  Can not access a needed shared library
OS error code  80:  Accessing a corrupted shared library
OS error code  81:  .lib section in a.out corrupted
OS error code  82:  Attempting to link in too many shared libraries
OS error code  83:  Cannot exec a shared library directly
OS error code  84:  Invalid or incomplete multibyte or wide character
OS error code  85:  Interrupted system call should be restarted
OS error code  86:  Streams pipe error
OS error code  87:  Too many users
OS error code  88:  Socket operation on non-socket
OS error code  89:  Destination address required
OS error code  90:  Message too long
OS error code  91:  Protocol wrong type for socket
OS error code  92:  Protocol not available
OS error code  93:  Protocol not supported
OS error code  94:  Socket type not supported
OS error code  95:  Operation not supported
OS error code  96:  Protocol family not supported
OS error code  97:  Address family not supported by protocol
OS error code  98:  Address already in use
OS error code  99:  Cannot assign requested address
OS error code 100:  Network is down
OS error code 101:  Network is unreachable
OS error code 102:  Network dropped connection on reset
OS error code 103:  Software caused connection abort
OS error code 104:  Connection reset by peer
OS error code 105:  No buffer space available
OS error code 106:  Transport endpoint is already connected
OS error code 107:  Transport endpoint is not connected
OS error code 108:  Cannot send after transport endpoint shutdown
OS error code 109:  Too many references: cannot splice
OS error code 110:  Connection timed out
OS error code 111:  Connection refused
OS error code 112:  Host is down
OS error code 113:  No route to host
OS error code 114:  Operation already in progress
OS error code 115:  Operation now in progress
OS error code 116:  Stale NFS file handle
OS error code 117:  Structure needs cleaning
OS error code 118:  Not a XENIX named type file
OS error code 119:  No XENIX semaphores available
OS error code 120:  Is a named type file
MySQL error code 120: Didn't find key on read or update
OS error code 121:  Remote I/O error
MySQL error code 121: Duplicate key on write or update
OS error code 122:  Disk quota exceeded
OS error code 123:  No medium found
MySQL error code 123: Someone has changed the row since it was read (while the table was locked to prevent it)
OS error code 124:  Wrong medium type
MySQL error code 124: Wrong index given to function
OS error code 125:  Operation canceled
MySQL error code 125: Undefined handler error 125
OS error code 126:  Required key not available
MySQL error code 126: Index file is crashed
OS error code 127:  Key has expired
MySQL error code 127: Record file is crashed
OS error code 128:  Key has been revoked
MySQL error code 128: Out of memory in engine
OS error code 129:  Key was rejected by service
MySQL error code 129: Undefined handler error 129
OS error code 130:  Owner died
MySQL error code 130: Incorrect file format
OS error code 131:  State not recoverable
MySQL error code 131: Command not supported by database
MySQL error code 132: Old database file
MySQL error code 133: No record read before update
MySQL error code 134: Record was already deleted (or record file crashed)
MySQL error code 135: No more room in record file
MySQL error code 136: No more room in index file
MySQL error code 137: No more records (read after end of file)
MySQL error code 138: Unsupported extension used for table
MySQL error code 139: Too big row
MySQL error code 140: Wrong create options
MySQL error code 141: Duplicate unique key or constraint on write or update
MySQL error code 142: Unknown character set used in table
MySQL error code 143: Conflicting table definitions in sub-tables of MERGE table
MySQL error code 144: Table is crashed and last repair failed
MySQL error code 145: Table was marked as crashed and should be repaired
MySQL error code 146: Lock timed out; Retry transaction
MySQL error code 147: Lock table is full;  Restart program with a larger locktable
MySQL error code 148: Updates are not allowed under a read only transactions
MySQL error code 149: Lock deadlock; Retry transaction
MySQL error code 150: Foreign key constraint is incorrectly formed
MySQL error code 151: Cannot add a child row
MySQL error code 152: Cannot delete a parent row
MySQL error code 153: No savepoint with that name
MySQL error code 154: Non unique key block size
MySQL error code 155: The table does not exist in engine
MySQL error code 156: The table already existed in storage engine
MySQL error code 157: Could not connect to storage engine
MySQL error code 158: Unexpected null pointer found when using spatial index
MySQL error code 159: The table changed in storage engine
MySQL error code 160: There's no partition in table for the given value
MySQL error code 161: Row-based binlogging of row failed
MySQL error code 162: Index needed in foreign key constraint
MySQL error code 163: Upholding foreign key constraints would lead to a duplicate key error in some other table
MySQL error code 164: Table needs to be upgraded before it can be used
MySQL error code 165: Table is read only
MySQL error code 166: Failed to get next auto increment value
MySQL error code 167: Failed to set row auto increment value
MySQL error code 168: Unknown (generic) error from engine
MySQL error code 169: Record is the same
MySQL error code 170: It is not possible to log this statement
MySQL error code 171: The event was corrupt, leading to illegal data being read
MySQL error code 172: The table is of a new format not supported by this version
MySQL error code 173: The event could not be processed no other hanlder error happened
MySQL error code 174: Got a fatal error during initialzaction of handler
MySQL error code 175: File to short; Expected more data in file
MySQL error code 176: Read page with wrong checksum
MySQL error code 177: Too many active concurrent transactions
MySQL error code 178: Index column length exceeds limit
MySQL error code 179: Index corrupted
MySQL error code 180: Undo record too big

MySQL-Server optimieren

Zurück zur “Webseiten beschleunigen” – Übersicht

7.) MySQL optimieren

cd  /root
wget  http://mysqltuner.com/mysqltuner.pl
wget  http://www.day32.com/MySQL/tuning-primer.sh
chmod +x mysqltuner.pl
chmod +x tuning-primer.sh
./mysqltuner.pl
./tuning-primer.sh

Link:
rackerhacker.com/mysqltuner/ – mysqltuner
www.day32.com/MySQL/ – tuning-primer


Beispiel:

Wenn wir unserem MySQL-Server z.B. 64 MB zur Verfügung stellen möchten ->

key_buffer = 12M + (read_buffer = 4M + sort_buffer = 4 M) x max_connections = 64 MB

12 + (4 + 4) x max_connections = 64


Formel nach max_connections umstellen

max_connections = (RAM – key_buffer) : (read_buffer + sort_buffer)

max connections = (64 – 12) : (4 + 4)

max_connections = 52 : 8

max_connections = 6,5


benötigen wir mehr als 6,5 max_connections, müssen wir mehr RAM zur Verfügung stellen oder read_buffer und sort_buffer kleiner einstellen…


[stextbox id=”info” caption=”Regel”]
Je weniger RAM zur Verfügung steht und je mehr max_connections benötigt werden, desto kleiner müssen read_buffer, sort_buffer u. key_buffer sein.

[/stextbox]


my.cnf – Konfigurationsdatei überprüfen ob der key_buffer so groß ist, dass alle Indizies in den Buffer passen und table_cache in etwa der Anzahl der Tabellen entspricht.


Zudem sollte man darauf achten, dass MySQL-Cache eingeschaltet ist.

-> query_cache_type=1


Als Anwendungsbeispiel werde ich an dieser Stelle die MySQL-Konfiguration meines Servers überprüfen ->

/root/mysqltuner.pl

Ich werde hier jedoch nur die Fehler, welches das Skript in meiner Konfig gefunden hat auflisten…

  • [!!] Total fragmented tables: 2

-> das nachfolgende Kommando schafft hier Abhilfe (könnte man so, oder so ähnlich auch als cronjob (crontab) laufen lassen

crontab -e


30 * * * * /usr/bin/mysqlcheck -u USER -pPASSWORT --auto-repair --check --optimize --all-databases > /dev/null 2>&1

In diesem Beispiel werden alle Datenbanken, jede 30 Minuten defragmentiert bzw. optimiert.


  • [!!] Key buffer size / total MyISAM indexes: 10.0M/13.7M

-> key_buffer = 15M erhöhen


7.1) MariaDB (MySQL-Fork)

In den letzen Wochen habe ich auch mit einem Mysql-Fork herumgespielt (MariaDB), dieser soll einige Vorteile in der Geschwindigkeit bringen. Man kann die Software über die Debian Pakete installieren nachdem man folgendes in seine “sources.list” aufgenommen hat.

deb http://mirror.ourdelta.org/deb lenny mariadb-ourdelta
deb-src http://mirror.ourdelta.org/deb lenny mariadb-ourdelt

… danach noch ein …

apt-get update

… und schon kannst du die Software gegen MySQL austauchen, dies funktioniert z.B. mit “aptitude” (mariadb-server) auch sehr gut, jedoch hatte ich das Problem, dass mein ISPConfig (eine Server Verwaltungsoberfläche) keine neuen Benutzer anlegen konnte, da sich die Syntax des Befehls ein wenig unterscheidet.


Webseiten beschleunigen – Übersicht

Der Artikel beschreibt, wie man seine Webseite bzw. seinen Server analysiert und optimiert um Performance zu gewinnen, Ladezeit zu reduzierten bzw. Traffic einzusparen. Man kann einiges an Performance gewinnen, indem man z.B. Bilder im richtigen Format abspeichert bzw. komprimiert, CSS- / JS-Dateien kombiniert und ebenfalls komprimiert oder auch bestimmt Daten vorkomprimiert zur Verfügung stellt.

1.) Webseiten Analyse
1.1) Webseiten Benchmark

2.) Komprimierung
2.1) Bilder komprimieren
2.1.1) Bilder Sprites
2.1.2) PNG-Bilder komprimieren
2.1.3) JPEG-Bilder komprimieren
2.1.4) Bilder komprimieren – Online
2.2) JavaScript/CSS komprimieren
2.2.1) JavaScript/CSS komprimieren – serverseitig
2.2.2) JavaScript/CSS komprimieren – Online
2.3) Apache gzip-Kompression
2.3.1) Aktiviere mod_deflate (gzip) – serverseitig
2.3.2) Aktiviere mod_gzip – serverseitig
2.3.3) Aktiviere gzip – manuell

3.) JavaScript richtig im HTML-Code platzieren

4.) Browser-Cache nutzen
4.1) Browser-Cache manuell einstellen
4.2) Browser-Cache serverseitig einstellen

5.) Webserver beschleunigen
5.1) Apache-Module deaktivieren
5.2) Reverse Proxy (Nginx)
5.3) Nginx als Webserver
5.4) Nginx mit Varnish (Proxy)

6.) PHP optimieren/caching
6.1) PHP-Daten zwischenspeichern
6.2) SQL-Abfrage mittels PHP zwischenspeichern
6.3) PHP-Module deaktivieren
6.4) php.ini (Konfiguration) optimieren

7.) MySQL optimieren
7.1) MariaDB (MySQL-Fork)


Zusammenfassung

Abschließend möchte ich diesen Thema noch einmal kurz zusammenfassen, so dass man ggf. selber weitere Möglichkeiten erkennt, die Ladegeschwindigkeit seiner Webseite zu verbessern, jedoch nicht auf die Technische Umsetzung eingehen.

Kenne deinen Feind !!!

80 bis 90% der schlechten Performance liegt an der Webseite selber und nicht auf der Serverseite, solange nur wenig Besucher auf deiner Webseite sind, braucht man sich eigentlich um einen Revere-Proxy oder eine alternative zu Apache keine oder zumindest nur wenig Gedanken machen, da die Performance erst mit steigender Besucherzahl einbricht. Jedoch sollte man in jedem Fall die gzip-Komprimierung und den Browser-Cache nutzen.

Externe Dateien (Bilder, JS, CSS, Videos…)

Jeder Aufruf einer Datei kostet Performance und Bandbreite, daher sollte man im allgemeinen weniger Requests produzieren, indem man z.B. JS- bzw. CSS-Dateien kombiniert. Dieser negative Einwirkung steigt dramatisch bei externen Dateien von andern Servern und besonders dann, wenn dieser gerade mal nicht erreichbar ist.

Scripte

Immer wenn eine Browser eine Webseite abruft und im HTML-Code ein Script finde, wird das weitere laden der Webseite eingestellt und erst-einmal die JavaScript Engine damit beansprucht, diesen zu interpretieren. Daher sollte man diese Dateien erst am Ende der Webseite laden lassen, so dass der User die Webseite früher sehen kann, auch wenn z.B. die Animation des Menüs erst nach nachgeladen werden muss. Mit diesem Ansatz, erscheint es nur Sinnvoll CSS-Daten am Anfang laden zu lassen, so dass sich die Webseite dem User direkt im korrektem Layout präsentiert.

Bilder

Ein weites großer Bereich sind Bilder, dabei muss man jedoch ein gutes Mittelmaß an Text und Bildern finden, da die User zwar Bilder immer schön finden.. Logo, Hintergrundbild u.s.w. jedoch macht es nur wenig Sinn seine selbst jeder kleine Datei zu optimieren, wenn man oben über der Webseite ein 300 KB großes Bild eingefügt hat. Wie bereit im Artikel beschrieben gibt es jedoch zahlreiche Methoden (PNG- und JPEG-Dateien) diese zu optimieren.

Yahoo hat zudem eine sehr umfassende Liste von weiteren Regeln zusammengestellt, welche man beachten sollte.

GreenSQL – MySQL Firewall

Was ist eine MySQL Firewall und wie funktioniert dies?

GreenSQL ist eine Open-Source-Datenbank-Firewall, um Datenbanken von SQL-Injection-Attacken zu schützen. Diese arbeitet als Proxy für SQL-Kommandos und hat eine eingebaute MySQL Unterstützung. Die Logik beruht auf der Auswertung von SQL-Befehlen, mit Hilfe eines Scoring-Risiko-Matrix sowie Sperrung bekannt db Verwaltungs-Befehle.

GreenSQL arbeitet als Reverse Proxy für MySQL-Verbindungen. Dies bedeutet, dass du dich anstatt direkt mit den MySQL-Server, zuvor mit GreenSQL verbindest. GreenSQL analysiert die SQL-Abfragen und wenn sie sicher sind, werden diese an den MySQL-Server durch-gereicht.

greenSQL
greenSQL

HowTo: Wie installiere ich die MySQL Firewall?

1. Download der Software

Das passende Paket von dieser Webseite herunterladen:

www.greensql.net/download

2. Installiere das entsprechende Paket

Debian/Ubuntu:

sudo dpkg -i PACKAGE_NAME.deb

Redhat/Fedora/CentOS/SuSe:

rpm -ihv PACKAGE_NAME.rpm

FreeBSD:

pkg_add PACKAGE_NAME.tbz

3. Datenbank anlegen & Konfiguration anpassen

Um die Konfiguration anzupassen und die Datenbank anzulegen, führst du nun folgendes Skript aus…

/usr/sbin/greensql-create-db.sh

und nun können wie die Firewall bereits starten

/etc/init.d/greensql* restart

4. Status der Firewall testen

um die Verbindung durch den MySQL-Proxy zu testen, führen wir folgendes Kommando aus…

mysql -h 127.0.0.1 -P 3305 -u root -p

5. Webseite mit einbinden

nun wird es Zeit, unsere Webseite in das Konstrukt mit einzubinden, dafür muss die Datei, wo die Verbindungseinstellungen zu MySQL eingestellt werden editiert werden.

Folgendes sollte in eine PHP-Datei zu finden sein und muss nun nur noch angepasst werden…

$link = mysql_connect('localhost', 'mysql_user', 'mysql_password');

… wird zu …

$link = mysql_connect('127.0.0.1:3305', 'mysql_user', 'mysql_password');

Wichtiger Hinweis:
Keine Verbindung zu “localhost”, verwende stattdessen immer “127.0.0.1”.

MySQL-Server beschleunigen

Nutze Google’s perftools um die Geschwindigkeit deines MySQL-Server zu erhöhen.

Das Google Perftools, insbesondere tcmalloc (Thread Caching Malloc), kann helfen z.B. den MySQL-Server zu beschleunigen…

TCMalloc ist schneller als die glibc 2.3 malloc (Wiki). Die Geschwindigkeitsvorteile durch die verbesserte Speicherzuordnung, kannst du wie folgt in MySQL integrieren.

Vorausgesetzt du nutzt Debian 5 (Lenny) oder neuer… fügen wir als erstes neue Repositories in der sources.list ein.

echo 'deb http://dotdeb.netmirror.org/ stable all' >> /etc/apt/sources.list
echo 'deb-src http://dotdeb.netmirror.org/ stable all' >> /etc/apt/sources.list

und aktualisieren ggf. den MySQL-Server auf Version 5.1

apt-get update
aptitude install mysql-server-5.1
aptitude install libtcmalloc-minimal0

Seit den mainstream MySQL-Paketen sind diese nicht mit den tcmalloc compiliert, daher müssen wir einen dynamischen OS’ Linker einbauen, indem wir folgende Zeile in dem MySQL init-Skript einfügen:

vim /etc/init.d/mysql

export LD_PRELOAD=”/usr/lib/libtcmalloc_minimal.so.0″

Capture - libtcmalloc

Nach einen restart des MySQL-Servers durch das init-Skript, profitiert dieser nun von der schnellern Speicherzuteilung.

/etc/init.d/mysql restart

Link:
www.dotdeb.org

MySQL root Passwort zurücksetzen

Wer sein root MySQL-Server Passwort vergessen hat, kann es mit folgendem HowTo wieder zurücksetzen…

füge folgenden Inhalt in eine neue Datei ein… ->

SET PASSWORD FOR 'root'@'localhost' = PASSWORD('MeinNeuesPasswort');"

nun müssen wir den MySQL-Server stoppen ->

/etc/init.d/mysql stop

und den MySQL-Server mit dem neuen Passwort starten ->

mysqld_safe --init-file=/PFADZUMFILE/FILE

nun nur noch ein restart des MySQL-Servers und Fertig…

/etc/init.d/mysql restart

alternativ kann man dies auch umgekehrt machen…

wir müssen den MySQL-Server wieder stoppen ->

/etc/init.d/mysql stop

dann den MySQL Daemon im safe-Mode starten ->

mysqld_safe --skip-grant-tables

per root in MySQL einloggen… ->

mysql --user=root mysql

und folgende Kommandos ausführen ->

UPDATE USER SET PASSWORD=PASSWORD('MeinNeuesPasswort') WHERE USER='root';
flush privilesges;
exit;

nun nur noch mysql-Server neu-starten und fertig…

/etc/init.d/mysql restart

jetzt nur nicht wieder das Passwort vergessen ;)